Tel: +44 (0) 1323 871 640
Email: sales@sussextrugs.com
Tel: +44 (0) 1323 871 640
Email: sales@sussextrugs.com

We use weather and boil proof European Birch plywood, 4mm thick to make the handles and rims of our South Down Trugs. The ply is cut to length and then cut into 1” (25mm) wide strips to make the rims. We use a slightly wider strip for the No.8 and Harvest Trugs. Three of these strips are nailed together to make a half rim, which is then placed in boiling water for about 15 minutes to soften the wood. These half rims are then placed in the former and nailed together using solid brass escutcheon pins at regular intervals, before being placed in a drying rack overnight. Next day the Craftsman will trim the end of the half rims and pin the two halves together before they are sanded.
Again the Birch ply is cut to length and then into 1” (25mm) strips for making the handles, which are made in one piece, unlike the rims. The wood is placed into boiling water for 15 minutes before being bent around the former to produce the handle. We use solid brass escutcheon pins to join the wood, except for the bottom of the handle, where we use galvanised steel nails as neither brass nor copper is strong enough to go through the thickness of wood there. They are then left to dry overnight.

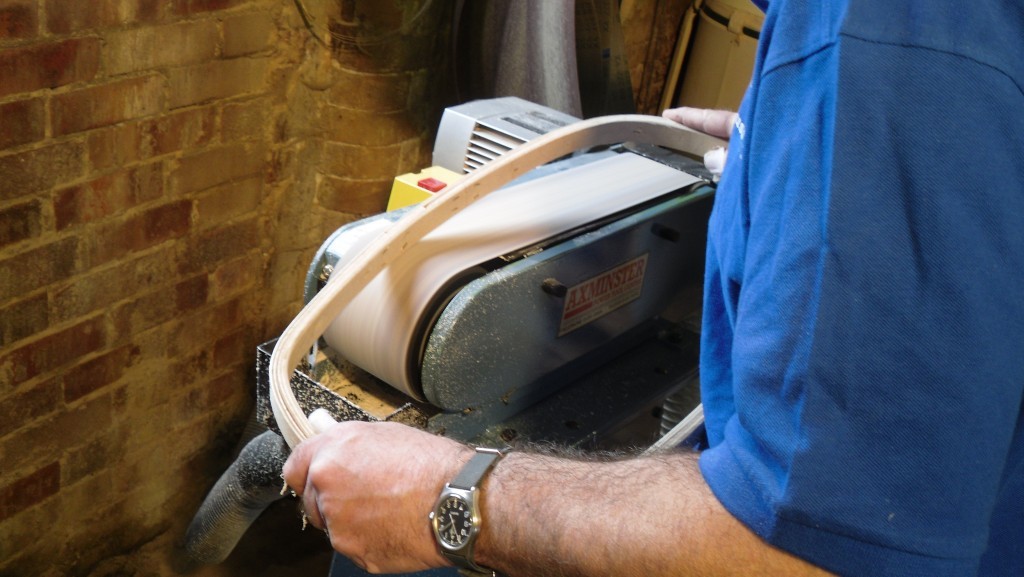
When the handles and rims are dry enough they are sanded on two different sanders, one for the sides of the handles and the other, called a brush backed sander, which sands the edges and insides of the handle or rim, making a nice smooth finish.
The boards used for the body of the Trug are made from 1.5mm thick Finnish Birch aircraft plywood, which is the same material that was used to make the Mosquito and other airplanes. It is, like the Latvian, strong and durable. There are many sizes of boards for our twelve different South Down Trugs and these are cut on a rip saw before being marked out and then cut to shape using a band saw.
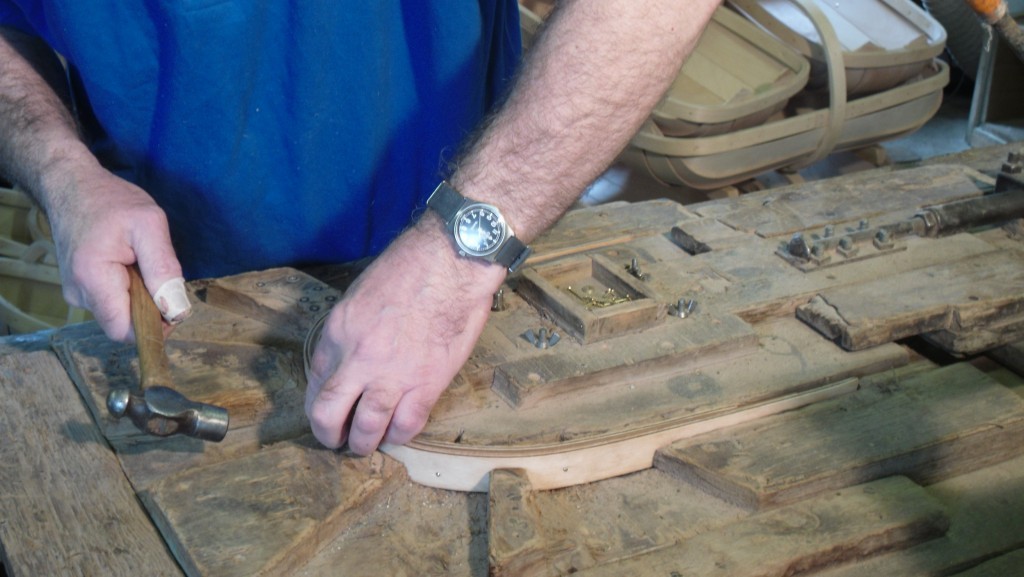
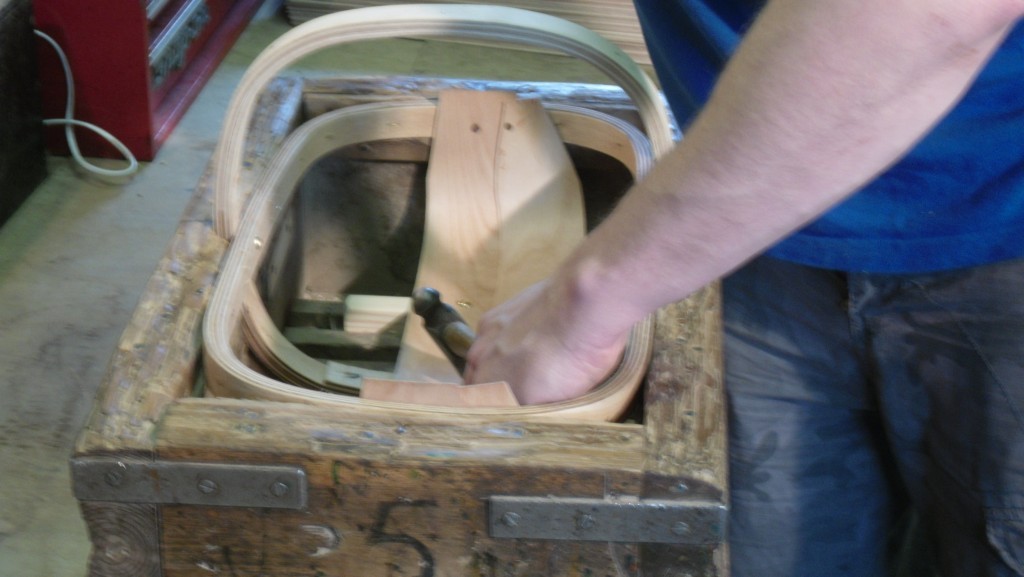
This is done in a wooden box. The feet are placed into the bottom of the box, inside special slots and then the handle is located into the centre of the box before the rim is slipped inside the handle. The rim and handle are then screwed together using solid brass screws and cups. The 1.5mm plywood boards are then placed in and fixed into position using solid copper tacks. The feet are also screwed into position during this process, again using solid brass screws and cups.
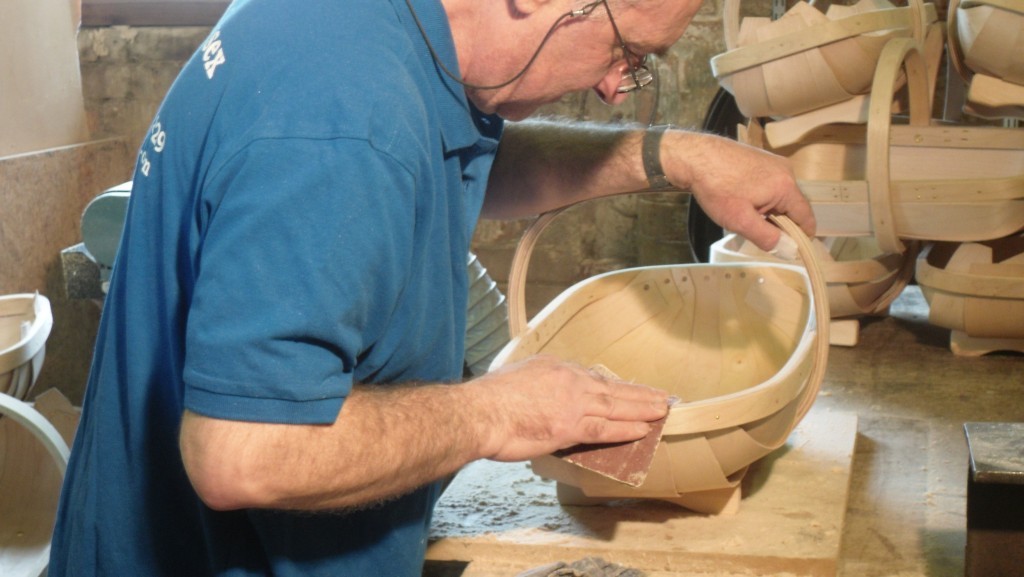
The excess wood from the boards, which protrudes above the end of the rim, is cut with a jig saw and then a Stanley knife is used to trim the boards inside the Trug to make them neat and tidy. Any gaps in the handle or rims are then filled and the whole Trug is given a hand sanding. The Trug can then be stained either on the handles and rims as required, before undergoing a final quality inspection, followed by the Maker signing his Trugs, our stamp being placed on the bottom together with a unique reference number, before being sent out to our customers.